Table of Contents
ToggleMilwaukee’s interior design scene pulls from a rich history of craftsmanship, industrial grit, and Midwestern practicality. From the exposed brick and timber in converted warehouses to the cozy farmhouse kitchens in Bay View bungalows, the city’s homes reflect a blend of old-world character and modern function. Whether someone’s tackling a Victorian rehab in the Third Ward or updating a ranch-style home in Wauwatosa, understanding Milwaukee’s design DNA helps make smarter, more cohesive choices. This guide walks through what sets Milwaukee interiors apart, the styles that resonate here, how to hire the right designer, what to budget, and how to DIY with confidence.
Key Takeaways
- Milwaukee interior design draws strength from the city’s industrial heritage, cream city brick, and bungalow architecture, making preservation of original details a cost-effective and character-defining approach.
- Popular styles in Milwaukee homes—industrial chic, modern farmhouse, and Midwestern comfort—emphasize warmth and functionality over trends, with neutral color palettes and layered textures suited to long winters.
- Hiring a local Milwaukee interior designer with experience in older homes and regional suppliers can prevent costly mistakes, with typical full-home design costs ranging from $8,000–$25,000.
- DIY interior design projects in Milwaukee succeed when respecting the home’s original architecture, prioritizing layered lighting for gray winters, and investing time in surface preparation and permit compliance.
- Strategic material choices like reclaimed wood, cream city brick finishes, and locally sourced salvage reduce costs while honoring Milwaukee’s unique design DNA and supporting the regional economy.
What Makes Milwaukee Interior Design Unique?
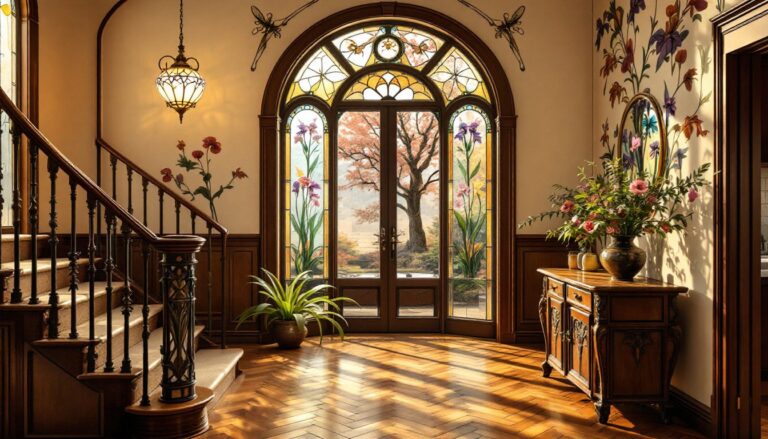
Milwaukee’s built environment shapes its interior style more than trends from the coasts. The city has an abundance of 1920s–1940s bungalows, cream city brick buildings, and timber-framed industrial spaces that offer architectural bones most designers elsewhere don’t get to work with.
Cream city brick, pale yellow bricks made from Milwaukee clay, shows up in exposed interior walls, especially in converted lofts and older commercial buildings. Designers often leave it raw or seal it with a matte finish to preserve texture without the dust. It pairs naturally with dark walnut trim, another regional signature from the city’s German heritage.
High ceilings and large windows in former warehouses and factories (especially along the Milwaukee River and in Walker’s Point) invite industrial design elements: steel beams, concrete floors, open ductwork. But unlike pure industrial looks, Milwaukee interiors tend to soften those hard edges with wood, textiles, and warm lighting, a nod to the Midwestern preference for livability over showroom aesthetics.
Historic homes often feature built-in cabinetry, pocket doors, and hardwood floors in oak or maple. Good designers preserve these details rather than rip them out. Refinishing original floors and restoring trim saves money and maintains the home’s character. If floors are beyond saving, engineered hardwood in similar tones keeps continuity without the cost of solid wood.
The climate also influences choices. Milwaukee winters are long and cold, so interiors lean toward warmth: deeper paint colors, layered window treatments for insulation, and area rugs over hardwood to cut drafts. Homeowners value function as much as form, mudrooms with built-in storage, durable entry flooring like porcelain tile or luxury vinyl plank (LVP), and spaces designed for real life, not just Instagram.
Popular Interior Design Styles in Milwaukee Homes
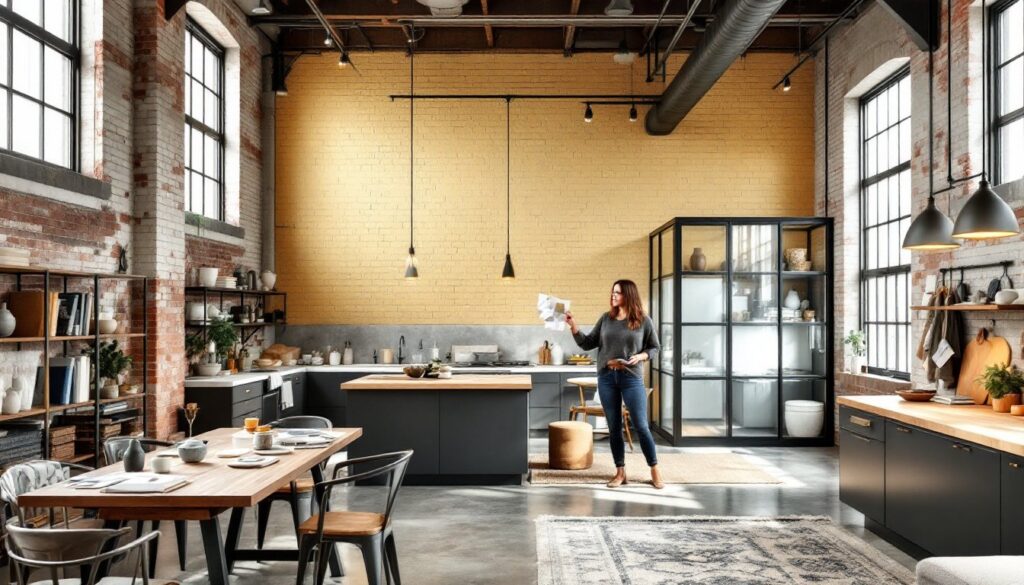
Industrial Chic and Urban Loft Aesthetics
This style dominates converted spaces downtown, in the Historic Third Ward, and throughout the Fifth Ward. Exposed brick, steel I-beams, polished concrete floors, and open floor plans define the look. Homeowners typically keep structural elements visible and layer in modern furniture with clean lines.
Key materials include blackened steel for railings and light fixtures, reclaimed wood for shelving or accent walls, and Edison bulb pendants (though dimmable LED versions offer better energy efficiency). Kitchen islands often feature butcher block or honed granite tops, and cabinetry tends toward flat-panel or slab doors in matte black, charcoal, or natural walnut.
One challenge with loft spaces: sound control. Concrete and brick reflect noise. Designers add fabric wall panels, thick area rugs, and upholstered furniture to absorb echoes. If the loft lacks interior walls, bookshelves or steel-framed glass partitions define zones without blocking light.
For DIYers, adding industrial touches doesn’t require a warehouse. Swapping standard light fixtures for metal cage pendants, installing pipe shelving in a home office, or using peel-and-stick brick veneer (which looks surprisingly good if installed carefully) brings the vibe into suburban homes. Always anchor heavy shelving to studs, pipe shelves loaded with books can weigh 50+ pounds per linear foot.
Modern Farmhouse and Midwestern Comfort
This style fits Milwaukee’s residential neighborhoods: Shorewood, Whitefish Bay, Tosa, and Bay View. It combines the clean lines of modern design with the warmth and texture of farmhouse elements, shiplap accent walls, apron-front sinks, open shelving, and mixed metals.
Color palettes stay neutral but warm: greiges, soft whites (Benjamin Moore’s Swiss Coffee and Sherwin-Williams’ Alabaster are local favorites), and muted blues or greens for accent walls. Trim is often painted white to contrast with natural oak or stained wood floors, a departure from the dark-stained trim common in older Milwaukee homes.
Kitchens get the most attention. White or light gray shaker cabinets, quartz or butcher block countertops, and subway tile backsplashes anchor the look. Designers mix finishes, matte black cabinet hardware, brushed nickel faucets, and wood or woven bar stools, to avoid a sterile feel.
DIY-friendly farmhouse updates include replacing upper cabinets with open shelves (make sure to hit studs or use heavy-duty toggle bolts in drywall), swapping cabinet hardware, and adding a farmhouse sink if the cabinet box can accommodate the extra width (typically 33–36 inches). Note: undermount apron sinks require solid surface or stone countertops: drop-in versions work with laminate but show a visible rim.
Textiles matter here. Linen curtains, cotton or wool throw blankets, and natural fiber rugs (jute, sisal, or wool) add softness. Avoid synthetic rugs in high-traffic areas, they mat down and look cheap within a year.
How to Choose the Right Interior Designer in Milwaukee
Start by clarifying the scope. Does the project need a full-service designer (space planning, material selection, contractor coordination) or a design consultant for a few hours of direction? Full-service designers typically charge a percentage of the project budget or a flat fee: consultants often bill hourly.
Look for designers with local project experience. Milwaukee’s housing stock and supplier network differ from other cities. A designer familiar with local tile shops (like Clayworks or Mosaic Tile), custom cabinet makers, and the quirks of older homes (knob-and-tube wiring, plaster walls, balloon framing) saves time and avoids costly mistakes.
Ask to see a portfolio that includes before-and-after photos of projects similar in scope and style. A designer who excels at modern minimalism might not be the right fit for a Craftsman restoration. Request client references and follow up, ask specifically about communication, budget management, and problem-solving when surprises came up (they always do).
Confirm licensing and insurance. While Wisconsin doesn’t require interior designers to hold a state license, many earn certifications like NCIDQ (National Council for Interior Design Qualification) or hold degrees in interior design. If the designer will coordinate with contractors or specify structural changes, verify they carry general liability insurance.
Discuss fees upfront. Typical structures include:
- Hourly rates: $75–$200/hour depending on experience
- Flat fees: $2,000–$15,000+ for full room or home designs
- Percentage of project cost: 10–20%, more common on large renovations
- Hybrid models: flat design fee plus hourly for shopping/installation
Get everything in writing: scope, deliverables, timeline, payment schedule, and how changes or additions get billed. Milwaukee designers are generally straightforward, but a clear contract prevents misunderstandings.
Cost of Interior Design Services in Milwaukee
Design fees in Milwaukee run lower than coastal markets but vary widely based on project complexity and designer experience. A single-room refresh (paint, furniture, accessories) with a consultant might cost $500–$2,500. A full-home design for a 2,000-square-foot house, including floor plans, material specs, and contractor coordination, typically ranges from $8,000–$25,000.
Designers who offer procurement services (ordering furniture, fixtures, and materials on the client’s behalf) may mark up those items 10–30% or charge a flat procurement fee. Some pass wholesale pricing through and bill only design time. Clarify this early, it significantly impacts total project cost.
Material and labor costs in the Milwaukee area (as of 2026) average:
- Interior painting: $2–$4 per square foot including labor and mid-grade paint
- Hardwood floor refinishing: $3–$5 per square foot
- Custom cabinetry: $500–$1,200 per linear foot depending on materials and finishes
- Tile installation (backsplash or floor): $10–$25 per square foot installed, depending on tile type and pattern complexity
These are ballpark figures. Prices shift with material availability, contractor schedules, and project specifics. Always get at least three quotes for any work involving contractors, and confirm those quotes include permits if required (kitchen and bath remodels often do, especially if moving plumbing or electrical).
DIYers can save 40–60% on labor by handling demolition, painting, and finish work themselves, but budget extra time. A professional painter knocks out a 12×15 room in a day: most DIYers need a full weekend including prep, cutting in, and two coats.
DIY Interior Design Tips for Milwaukee Homeowners
Start with a plan, not a paint chip. Measure the space, sketch a floor plan (graph paper works, or free tools like SketchUp or Floorplanner), and identify what stays and what goes. Knowing furniture dimensions before buying prevents costly returns.
Respect the home’s architecture. A 1920s bungalow looks odd with ultra-modern minimalism: a 1980s split-level can handle bolder contemporary choices. If the home has original trim, doors, or built-ins, work with them. Painting wood trim is fine (and common in Milwaukee farmhouse renovations), but stripping or refinishing is often easier than replacement and keeps period details intact.
Prioritize lighting. Milwaukee’s gray winters make good lighting essential. Layer ambient (ceiling fixtures or recessed cans), task (under-cabinet, reading lamps), and accent (picture lights, sconces) lighting. Dimmer switches ($15–$30 each, easy DIY install if you’re comfortable with basic electrical) let one fixture serve multiple moods. Use LED bulbs rated 2700K–3000K for warm, inviting light: anything above 4000K reads cold and institutional.
Test paint colors in place. Milwaukee’s latitude and lake-effect cloud cover change how colors read. Buy sample pots, paint 2×2-foot squares on different walls, and observe them over a few days in natural and artificial light. Colors shift dramatically between morning sun and evening lamplight.
Source materials locally when possible. Milwaukee has strong salvage and surplus options, Habitat ReStore, Earthen Treasures, and assorted architectural salvage yards carry reclaimed wood, vintage fixtures, and hardware at a fraction of new retail. Buying local also cuts shipping costs and supports the regional economy.
Don’t skip prep work. Whether painting, tiling, or installing flooring, surface prep determines results. Clean, sand, prime for paint. Level subfloors within 1/8 inch over 10 feet for tile or LVP. Let wood flooring acclimate to the home’s humidity for 48–72 hours before installation (critical in Milwaukee’s humidity swings between summer and winter).
Know when to call a pro. Moving walls, rerouting plumbing or HVAC, upgrading electrical panels, and structural repairs all require permits and often licensed contractors. Milwaukee’s building codes align with the IRC (International Residential Code), but the city enforces them strictly. Unpermitted work can complicate insurance claims and home sales. When in doubt, check with the City of Milwaukee Department of Neighborhood Services or a licensed contractor.
Safety first. Wear safety glasses when cutting, sanding, or drilling. Use a NIOSH-approved respirator (not a dust mask) when sanding old paint (pre-1978 homes likely have lead paint) or working with solvents. Cut with the blade guard on, clamp materials securely, and keep a first-aid kit and phone nearby. Most DIY injuries come from rushing or skipping basic precautions.