Table of Contents
ToggleA vision board isn’t just for goal-setting seminars. When applied to interior design, it becomes a practical planning tool that helps homeowners and DIYers make smarter decisions about paint colors, furniture layouts, and finishes before spending a dime. Instead of wandering paint aisles hoping for inspiration or buying a sofa that clashes with the rug, a vision board creates a visual roadmap. It filters out the noise, clarifies style preferences, and prevents costly mismatches. Whether someone’s tackling a single room refresh or planning a whole-house renovation, building a vision board first saves time, money, and regret.
Key Takeaways
- A vision board for interior design is a curated collection of images, colors, and materials that prevents costly mismatches and serves as a visual roadmap for smarter design decisions.
- Vision boards reveal design patterns and preferences that might not be obvious when browsing randomly, helping homeowners identify repeating elements like warm wood tones or brass accents that define their style.
- Using a hybrid approach with both digital boards (for convenience and sharing) and physical samples (for accurate color and texture assessment) provides the best balance for planning any interior design project.
- Breaking your vision board project into phases—structural changes, surfaces, then furnishings—ensures proper prioritization and prevents costly mistakes when executing your design plan.
- Testing paint samples in actual lighting conditions, living with them for several days, and comparing progress photos to your vision board keeps the project on track and reduces design drift during long renovations.
What Is a Vision Board for Interior Design?
A vision board for interior design is a curated collection of images, materials, colors, and textures that represent the look and feel someone wants to achieve in a space. Unlike a mood board used by professional designers, which often includes technical specs and finish schedules, a vision board focuses on visual cohesion and emotional direction.
It typically includes magazine clippings, paint chips, fabric swatches, photos of furniture, lighting fixtures, and flooring samples. The goal isn’t perfection, it’s clarity. By assembling these elements in one place, patterns emerge. Maybe every image features warm wood tones and matte black hardware. Or perhaps cool grays and brass accents dominate. These patterns reveal a design direction that might not have been obvious when browsing random Pinterest boards.
Vision boards work for any space: kitchens, bathrooms, living rooms, bedrooms, even basements and garages. They’re especially useful when coordinating finishes across multiple rooms or when working with a partner who has different tastes. Seeing everything side-by-side makes it easier to spot what works and what doesn’t before committing to purchases.
Why Vision Boards Transform Your Design Process
Vision boards prevent the most common DIY design mistake: buying items in isolation. That “perfect” accent chair might look great in the store, but if it doesn’t align with the rest of the room’s color palette or style, it becomes an expensive problem.
They also speed up decision-making. Instead of second-guessing every paint sample or tile choice, a vision board provides a reference point. Does this subway tile backsplash fit the established aesthetic? Check the board. The answer becomes obvious.
For renovations that span weeks or months, vision boards maintain consistency. When choosing cabinet hardware in week one and light fixtures in week eight, it’s easy to drift off-course. The board keeps the original vision intact, especially when fatigue or decision overload sets in.
Vision boards also improve communication with contractors, painters, or anyone helping with the project. Handing over a visual reference is clearer than describing “sort of a modern farmhouse vibe with industrial touches.” It reduces misunderstandings and ensures everyone’s working toward the same result.
Finally, they set realistic expectations. If every inspiration image features custom millwork and marble countertops, but the budget allows for stock cabinets and laminate, the vision board forces an honest conversation about priorities and compromises early in the process.
How to Create an Interior Design Vision Board Step-by-Step
Gathering Inspiration for Your Vision Board
Start by collecting images without filtering or editing. Browse home improvement magazines, design websites, social media platforms, and even neighborhood walks. Screenshot rooms that feel right, tear out magazine pages, snap photos of interesting color combinations in stores. At this stage, quantity beats quality.
Pay attention to specific elements, not just whole rooms. Maybe it’s the way natural light hits a wood floor, or how open shelving balances with closed cabinetry, or the contrast between a navy island and white perimeter cabinets. Collect paint chips from hardware stores, grab multiple shades in the same family. Visit flooring showrooms and ask for sample planks or tile pieces.
Include textiles and materials. Fabric stores often give small swatches. Hardware stores carry sample cards for countertop laminates, cabinet door styles, and backsplash tiles. If considering a specific piece of furniture, print a photo or screenshot the product listing. The goal is to gather tangible, visual references that can be arranged and rearranged.
Don’t ignore functional inspiration. If a kitchen layout solves a storage problem or a bathroom configuration maximizes a small footprint, capture that. Vision boards aren’t just about aesthetics, they’re about how a space works.
Organizing Your Design Elements and Themes
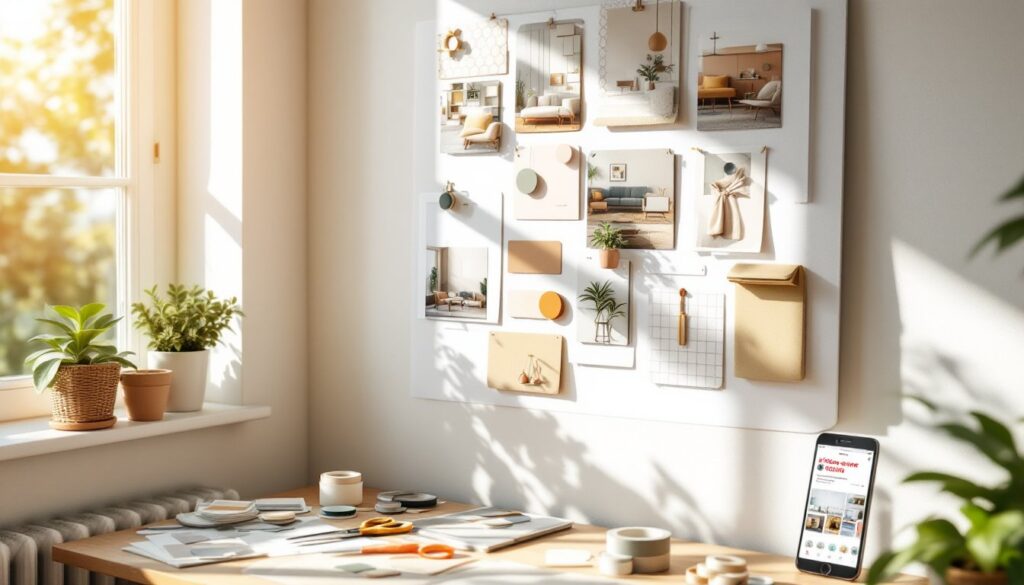
Once the collection phase winds down, usually after a week or two, it’s time to edit. Spread everything out on a large table, floor, or wall. For physical boards, use a foam core board (20″ × 30″ or larger), cork board, or even painter’s tape on a blank wall.
Group similar items together: all paint chips in one area, flooring samples in another, furniture images nearby. Look for repeating colors, materials, or styles. If brass fixtures appear in eight out of ten images, that’s a strong signal. If half the photos show white shiplap and the other half show dark wood paneling, there’s a decision to make.
Eliminate anything that doesn’t fit the emerging pattern. This is where most people struggle, letting go of a beautiful image that doesn’t align with the overall direction. Be ruthless. A cohesive vision board with fifteen well-chosen elements beats a cluttered one with fifty conflicting ideas.
Arrange the remaining pieces on the board. There’s no single correct layout, but many people organize by category (paint/flooring/furniture) or by room area (kitchen island/backsplash/upper cabinets). Step back and check for visual harmony. Do the colors work together? Do the textures complement or clash? Does the overall feel match the intended mood, cozy, airy, bold, minimal?
Secure everything in place. For physical boards, use double-sided tape, push pins, or glue sticks. Label key elements if helpful: “wall color,” “accent color,” “primary wood tone,” “metal finish.” This makes it easier to reference later when shopping or working with contractors.
Digital vs. Physical Vision Boards: Choosing Your Format
Physical boards offer tactile benefits. Holding an actual paint chip next to a fabric swatch reveals undertones that don’t translate on screens. Samples can be carried into the room at different times of day to see how natural and artificial light affect them. There’s also something satisfying about arranging pieces by hand.
They do require space and materials, foam core, adhesive, a surface to work on, and they’re not portable. If shopping for furniture or meeting with a contractor, hauling a 30″ board around isn’t practical. Photos of the board work, but that negates some of the physical advantages.
Digital vision boards solve portability. Apps like Canva, Milanote, and Pinterest (using secret boards to stay organized) allow users to collect, organize, and edit images from anywhere. They’re easy to share with partners, designers, or contractors via link or screenshot. Digital boards can be updated instantly, swap a paint color or furniture piece without reprinting or re-gluing.
The downside: screens don’t show true color. A warm beige on a phone might look cool gray on a laptop and something else entirely in person under LED shop lights. Digital boards work best when paired with physical samples of final selections, order paint samples, request fabric swatches, get tile chips mailed.
Many DIYers use both: a digital board for broad inspiration gathering and editing, then a physical board for final selections and material coordination. This hybrid approach balances convenience with accuracy. The digital version stays on a phone for shopping trips: the physical version sits in the workspace as a constant reference during the project.
Turning Your Vision Board Into Reality
Once the vision board is set, the next step is translation. Break the project into phases: structural changes first (if any), then surfaces, then furnishings and decor. If the vision includes removing a wall or moving plumbing, check local building codes and permit requirements. Load-bearing walls require engineer approval and permits. Electrical and plumbing work often need licensed professionals and inspections.
For surface work, paint, flooring, tile, order samples of final selections and test them in the actual space. Paint at least a 2′ × 2′ section on the wall, not just a brushstroke. Live with it for a few days, observing it in morning light, afternoon sun, and evening lamplight. Lay flooring samples on the existing floor and walk over them. Place tile samples on the counter or wall where they’ll be installed.
Create a purchase priority list based on the vision board. Focus on the largest, most permanent elements first: flooring, cabinetry, major appliances, built-ins. These are harder to change later. Wall color and decor are easier to adjust if needed. Buy furniture and accessories last, once the room’s bones are set.
Stick to the vision board, but allow minor flexibility. If the exact light fixture isn’t available or the budget doesn’t stretch to the preferred countertop, refer back to the board’s overall direction. Choose the option that best aligns with the established color palette, material, and style, not the cheapest or most readily available.
Take progress photos and compare them to the vision board. This keeps the project on track and provides motivation when the space is torn apart mid-renovation. If something feels off, revisit the board. Often, the issue is a deviation from the plan, a different shade of grout, mismatched hardware, or an impulse decor purchase that doesn’t fit.
Vision boards aren’t contracts. They’re guides. But treating them as serious planning tools rather than casual inspiration reduces mistakes, saves money, and results in spaces that feel intentional and cohesive instead of randomly assembled.